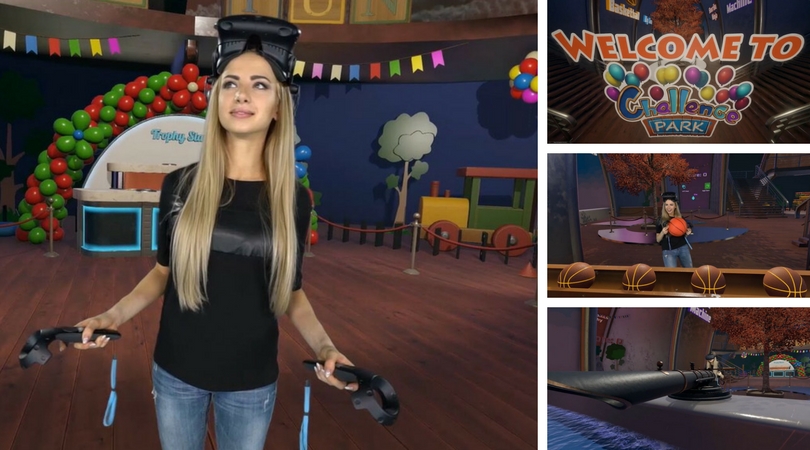
How To Make A Mixed Reality Video from Unity and SteamVR
X Reality (XR or Cross Reality) can be used as an umbrella term for virtual reality (VR), mixed reality (MR), and augmented reality (AR). XR incorporates a wide range of tools (both hardware and software) that enable content creation for VR, MR, AR, and cinematic reality (CR) by bringing either digital objects into a physical world or bringing physical objects into a digital world. The term XR is flexible, that is why it features “X” which represents a variable that isn’t fully specified and means that an open ecosystem will continue to extend.
Mixed reality (also called Hybrid Reality or MR) is used as an independent concept or to classify the spectrum of reality technologies as referenced in the reality-virtuality continuum. As an independent concept, MR means that there are virtual spaces where objects of the real world and people are integrated into the virtual world. When real and virtual worlds are merged together, new environments are produced. In these environments, physical and digital objects can co-exist and interact in real time.
MR and its subcategories have different use cases, and in this article, we focus on the major ones. They are trailer shooting, studio shooting, and streaming.
In this article, ARVI VR shares the experience of capturing a mixed reality video from Unity and SteamVR concerning these use cases.
How to Integrate a Mixed Reality Video into Unity
If VR devs want to create a game with the Vive/Oculus or any other SteamVR compatible headset on Unity, the first step is to download a library called SteamVR. The library has a lot of bonus content for Unity.
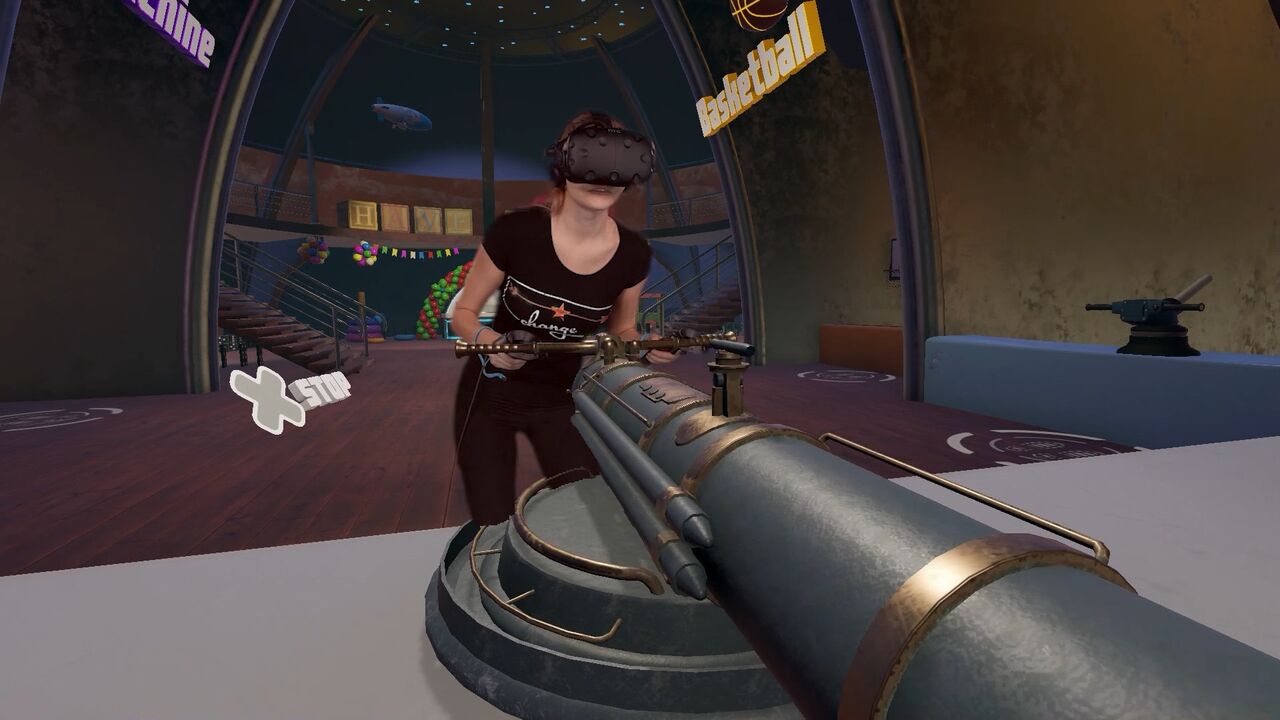
The library will respond if there is a file called “externalcamera.cfg” in a game folder. To receive images for MR, you should put this file into the game folder. In this file, coordinates are put which enable the linking of a real camera to a virtual camera. The presence of this file changes the image output the player sees on the monitor during the game. It outputs four quadrants: a foreground, a background and foreground, a view from the camera, and the 4th section is not used. This section is needed to compose the video and insert an additional layer between these two layers. This additional layer is shot with a real camera, and there will be an actor in a clipped background and some items (if any) from the real world.
SteamVR features a SteamVR_Render script, and by adding this script to the necessary prefabs, the needed result will be achieved – a picture will be rendered. Note that the script will work only providing that there is a file in the game folder with the name “externalcamera.cfg” or any other name which you will specify in the script.
Attaching the script to the object in the location in the scene is not enough. The file that will transmit information about the way the physical camera is plugged is still needed. The idea here is to connect the script to either one of the hands, or to the Tracker.
This brings us to the next question...
Where to Attach the Script?
Here’s an example of the player’s prefab. Attaching the script in this way means that the script will create "externalcamera.cfg" itself.
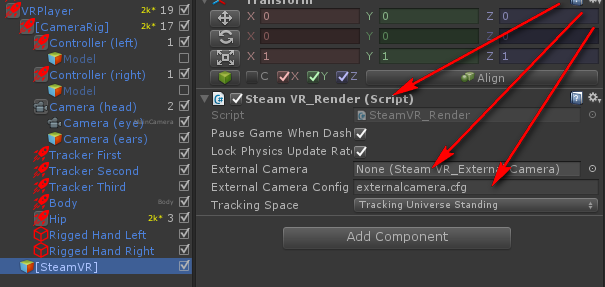
Though the script may be attached either to a Controller or a Tracker, we recommend attaching it to the Tracker because, in this case, both hands are free.
Providing that the Vive Tracker is used, the angle of view of a physical camera lens should be attached to the view of a virtual camera so that there are only a few discrepancies in scale distortions during motion.
The only attachment solution is to connect the field of view (FOV) of the real camera and the FOV of the virtual camera so that a virtually scaled picture of the location of any object in the gamespace is obtained.
If the real camera starts moving (rectilinear, curvilinear motion), then it is necessary to synchronize all the parameters by points. They are FOV, XYZ, and rotation – RX, RY, RZ. By doing this, a perfect alignment is achieved.
Pitfalls and Ways to Avoid Them
During our work, we’ve faced some problems and found out certain ways to solve many common problems. Here are handy tips for the developers.
Matter 1: Video Streams are Rendered in a Single Window
Video streams can’t be rendered in different windows.
Solution:
Unity can render the picture only in one window. So, the only possible way to split video streams into the foreground and background is to render everything in one window which is four times larger than the original one. In this case, the foreground and the background will be put there.
Matter 2: File Contents are Unreadable
The file contents of the .cfg file were unreadable because the Cyrillic local and Decimal separators were neither a period nor a comma. The problem was that SteamVR devs didn’t take into account that the file can be run on different computers with different locales which can have different number formats with a period, comma, etc.
Solution:
Changing locale settings isn’t an option since the problem will arise on the computers of other players in other locales who want to stream a game. Therefore, correct the part of the code that reads the file so that it understands all types of separators.
Matter 3: Camera Sync
To combine a tracked object of the real camera with a tracked object of the virtual camera so that they show the same thing is a daunting task.
Solution:
There are utilities based on Unity. These programs allow composing all the points by + or – on all axes so that a matrix point corresponds in both real and virtual environments.
For the objects to be synchronized, the parameters of the FOV angle, an offset relative to a tracked object, and a rotation relative to a tracked object should be set. A focal length is not synchronized but is set manually.
Here is an example of the file contents externalcamera.cfg:
x=0.001057133
y=0.1042561
z=-0.0736331
rx=272.3893
ry=286.1903
rz=254.3431
fov=62.26534
near=0.1
far=1000
smaa=2
r=255
g=0
b=255
Matter 4: The Script Should be Modified
The script in its original form works only for a narrow range of cases, so it needs to be modified. The problems we faced were that during the play area rotation it didn’t work properly and didn’t cut off redundant geometry.
Solution:
The Valve script uses a quad. This is one of the simplest cut-off solutions for a foreground and background. We have modified the quad: changed its shaders, added the ability to color-code the quad. We did this because by default the quad is black, and when a black object appears in the game, it disappears with everything that the black quad covers.
Therefore, we switched to a pink color (1, 0, 1).
Matter 5: A View from the Headset
A standard library doesn’t give a full view from the headset; it cuts the screen into four parts. In one part of the screen, Alpha channel is an output, but there is no useful data, and it’s impossible to use it without changing the original code to render this part. Being that the library renders other views over the view from the headset, only one-quarter of the view is shown, and it is not overlapped.
Solution:
If you need that part of the image, one more camera should be added and rendered so that the 4th segment of the view from the headset should be rendered separately – or you just can copy a current frame-buffer.
Matter 6: Post-effect Problems
Such post-effects as motion blur, bloom, anti-aliasing, sun shaft, edge detection, chromatic aberrations, unnecessary reflections, a vignette effect, DOF, Bokeh DOF, an eye adaptation, and any types of HDR to LDR mapping post effects blur the pixels and distort the picture.
Solution:
While using any anti-aliasing (TAA/MSAA/FXAA) during video superimposition, a thin line is visible. This is a shift of two channels – a foreground and a background. Anti-aliasing for a foreground layer should be disabled manually so that upon imposition there’s no thin line. If this effect isn’t disabled in a video-capturing software tool, artifacts occur. Therefore, it’s important to configure carefully both the game and a video-recording program.
Also, a bloom effect in the foreground should be disabled because half of the picture is cropped and the rest is a black background which should be clipped by the color key (pink). Anything that appears in a pink background isn’t cut off, and artifacts will occur.
Also, Screen Space Reflections are another effect that can be problematic since if the piece of the screen is missing and the foreground reflects the background, but if it is rendered clipped, it will reflect a pink screen – something that doesn’t exist in the depth buffer.
Needless to say, the use of an HDR eye adaptation and any types of HDR–>LDR mapping post effects should be eliminated because they take into account the whole picture. If the picture lacks one piece, then they can adapt to the missing area rather than to the whole picture, and in this case, the foreground and background will differ greatly.
What is more, ambient occlusion shouldn’t be used as it takes into account the depths of a Z-buffer.
With that, these effects may be used for the background, but then a problem of a significant difference between the foreground and background occurs. Note that if these effects are included, many adjustments should be made manually.
Considering all the above, ARVI VR comes up with a list of post-effects that really work. They are Color Correction and a Film grain effect, provided that the noise is time-bounded and it is repeated in each layer equally.
How to Set Up a Studio for Shooting Games that Support SteamVR
The games made for Steam VR which have a script attached to the tracking object are win-win options for people who play them on Twitch. Therefore, these games are well monetized and developers are advised to attach this script.
Since one of the most popular use cases of mixed reality is streaming on Twitch and YouTube, ARVI VR shares recommendations on how to set up a studio for shooting games that support SteamVR.
You’ll have to do several steps providing that you have the HTC Vive or Oculus Rift headset.
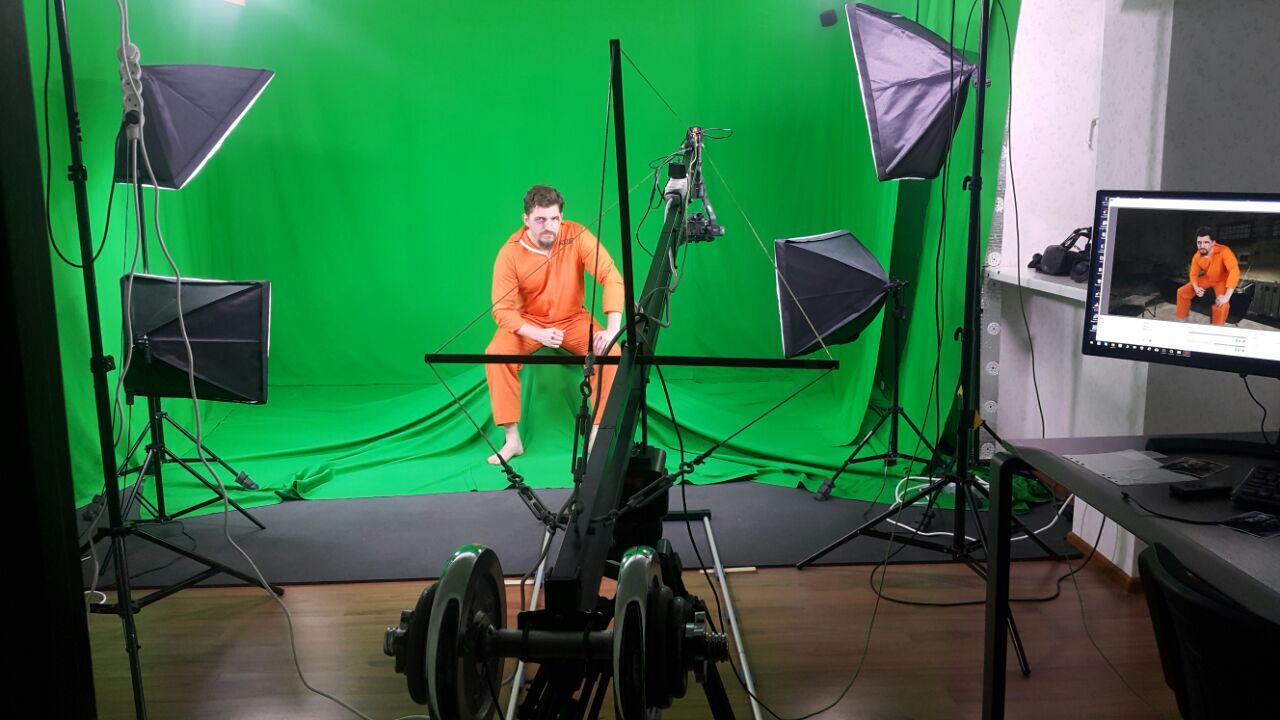
Studio Setup
1. Buy the necessary equipment: a digital camcorder, an HDMI Capture Card, a green screen, an HDMI Extension cord, and a USB Extension cord.
The process is simple: a camera transfers the picture over an HDMI extension to the HDMI capture card, and from the capture card, the picture is fed into the software. You may consider such software options as OBS (free), XSplit, vMix (buy).
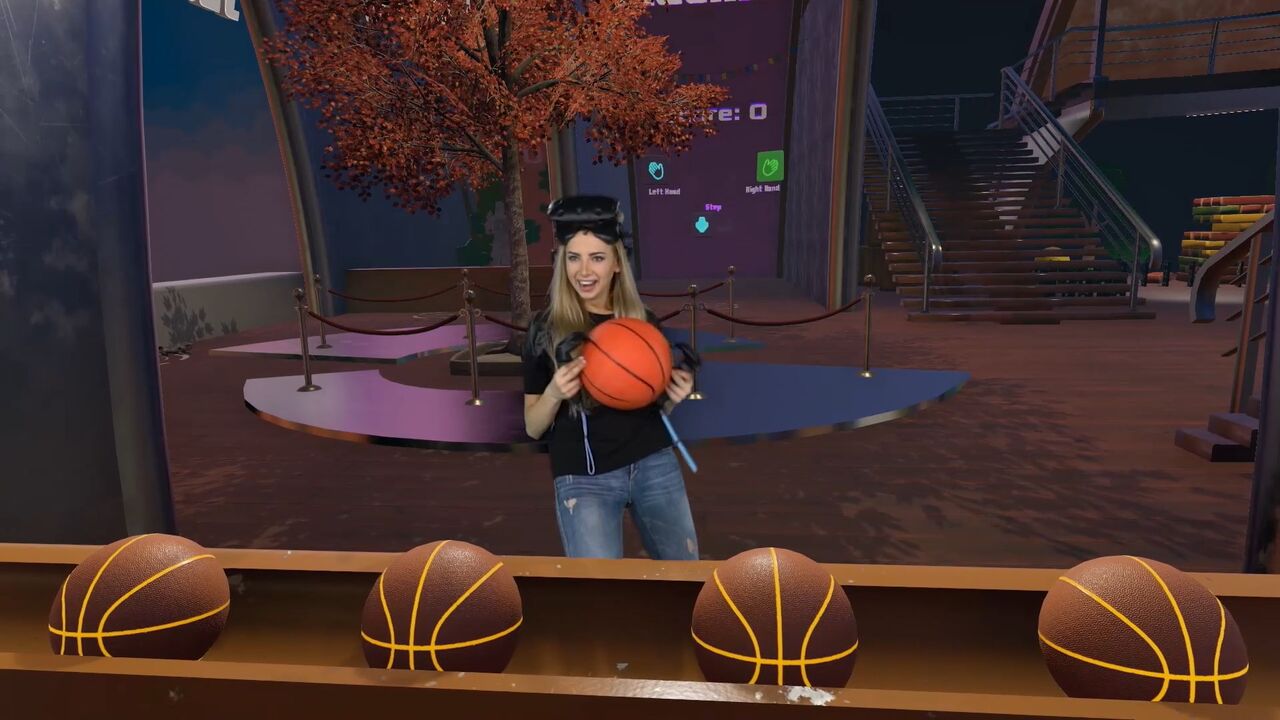
2. Set up a green screen. Just take a green fabric and find some big racks to hold it. Having the green screen is vital because it allows removing everything from the camera’s feed except for the player’s body movements. These movements are combined with a view from another camera in VR. Once two cameras are synchronized, the views of two different realities can be seamlessly combined into a single video.
3. Install a capture card, then connect the HDMI-in port on the capture card and the HDMI-out port on the camera. Note that you’ll need long extensions to let the camera move freely without getting tangled with the Vive cords.
4. Make sure you have bright lighting. If there is a floor which is a few shades darker than the green background and walls, the program may not remove both shades of green at the same time. Bright lighting solves the problem and makes sure shadows aren’t cast on the screen.
Game Setup
You should configure settings inside your game. In this case, you’ll get four views in the virtual world. One quadrant will show a foreground, the second one will show the background, the third one will provide a real-camera view, and these three layers are merged together in real time. After that, set up broadcasting software. The process of software setup is varied and depends on the program you use.
Camera Sync
To sync a real camera and an in-game camera, you should figure out the FOV of the physical lens and match it to the virtual camera. This has to bed one manually, and it is better to have an assistant who will help you so that you have a clear idea where the camera should be positioned when a person goes into a virtual world. The person should pick up two controllers and walk through the play area. Then, the assistant shouldn’t move and stand still in a T-pose for a few seconds.
When you’ve figured out the FOV, offset the position of the camera in XYZ to the center location of the sensor on the camera. Also, compensate for any rotation on the XYZ axis.
Additional Tips
For a good result, there should be a pavilion with a green background and green walls. Also, there should be an assistant, who will control the streaming process (uninterrupted operation of the Internet and software).
Since this is a pretty intensive operation, and the computer is overloaded with rendering the scene multiple times, it’s better to set up a second computer to take the video feed from the camera and the game to composite in real-time for preview and also take the brunt of writing the files to disk.
To record a mixed reality video, it’s better to use a 4K monitor – eventually, you’ll get a video stream, consisting of four Full HD streams. You can record this stream both from the screen using software or record with the help of professional recorders with high-quality codecs.
Bottom Line
The way to capture a mixed reality from Unity and SteamVR is to use a SteamVR library. The script in this library should be modified because, in its source form, it is suitable only for a narrow range of cases.
Use utilities that generate the contents of the .cfg file. For camera sync, the tracked objects of the real camera and the virtual camera should be synchronized. For this, set a FOV angle, an offset relative to a tracked object, a rotation relative to a tracked object, and a focal length is set manually.
The script uses the quad that cuts off the foreground and background. The quad’s shaders should be altered, and the ability to color-code the quad should be added.
To improve the view from the headset, one more camera should be added and rendered so that the 4th segment of the view from the headset should be rendered separately, or a current frame-buffer can be copied.
After effects that blur the pixels in any way and distort the picture should be disabled for rendering the foreground. They are motion blur, bloom, any anti-aliasing (TXAA/MSAA/FXAA), ambient occlusion, chromatic aberrations, unnecessary reflections, a vignette effect, sun shaft, edge detection, DOF, Bokeh DOF, Screen Space Reflections, an HDR eye adaptation, and any types of HDR->LDR mapping post effects. However, Color Correction and a Film grain effect (providing that the noise is time-bounded and it is repeated in each layer equally) can be used.
For streaming, you should set up the studio (a digital camcorder, an HDMI Capture Card, a green screen, an HDMI Extension cord, a USB Extension cord, and bright lighting) for the game, and you should ensure camera sync (the FOV, XYZ). To organize a live stream, or to save out the video feed, software is needed. Consider OBS, XSplit, or vMix programs. Also, use a 4K monitor and two computers with powerful graphics cards to perform all the necessary tasks.